Rendering and export
Enable Studio/PBR in the viewport display strip to preview materials and lighting. Renderer Options controls tone mapping, exposure, environment lighting, reflections, ambient occlusion, and bloom, and provides the settings for rendering an image.
Native for macOS and iPadOS. Inspect, render, and export Forge projects from either platform.
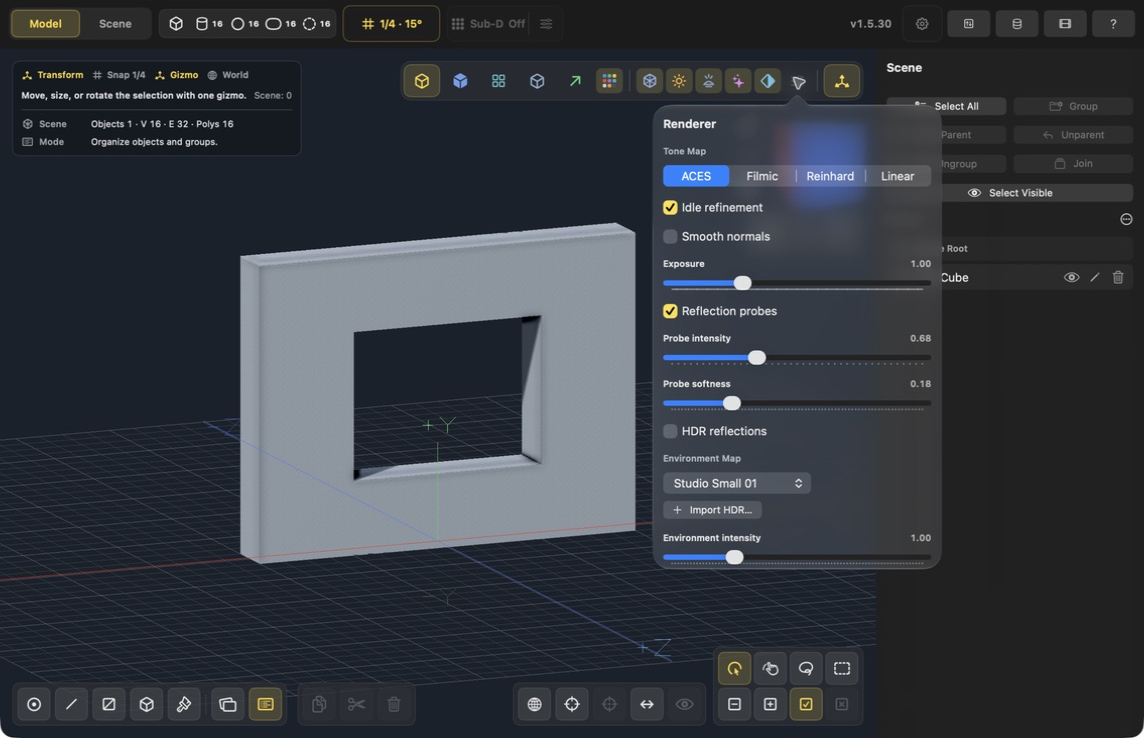
Mac SwiftUI interface, v1.5.30. The transparent-cube Studio/PBR button reveals the additional renderer controls. The slider icon opens this popover.
Find the renderer controls
- Turn on Studio/PBR using the transparent-cube button in the viewport's upper display strip. On Mac, Mode → Toggle Studio/PBR provides the same switch.
- Turn on Environment (sun icon) if you want HDR lighting. The Environment Map picker is disabled while Environment is off.
- Open Renderer Options with the slider icon in the same display strip.
- Adjust Exposure and the environment settings while inspecting the viewport.
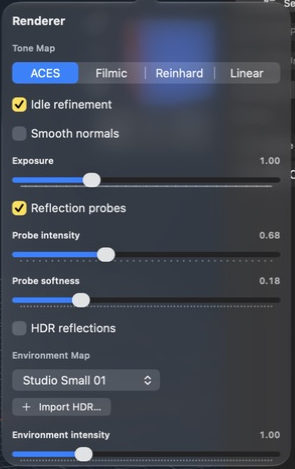
Renderer close-up. Enable Smooth normals to reveal Smooth angle; enable Environment to reveal its rotation control.
For a still image, scroll inside Renderer Options to Path Tracing, samples per pixel, Width, Height, and Render Image. Image rendering and model-file export are separate operations.
Environment and shading
Choose an Environment Map in Renderer Options to light the model with one of six built-in HDR environments. Environment intensity and rotation adjust how that map illuminates the asset, while HDR reflections control whether it appears in reflective material response. Environment choices are stored per document; existing documents continue to use Studio Small 01 by default.
Use Import HDR… to add a Radiance HDR environment to the Forge library. Imported maps appear by filename in the Environment Map menu and remain available across documents and launches. Selecting a custom map changes the current document's environment without altering its geometry or materials.
Enable Smooth normals for interpolated viewport shading, then use Smooth angle to set the maximum angle across which normals are blended. Lower values preserve crisp hard-surface breaks; higher values smooth across broader curvature. The default is 70°.
Export formats
Open Import and Export using the up/down-arrow button in the top toolbar to choose a model export format. Select the format for the destination that will consume the file:
| Format | Best for |
|---|---|
| STL | Printable geometry and fabrication workflows. The export uses visible evaluated geometry, including Sub-D preview, and converts project units to millimeters. |
| OBJ texture bundle | Broad DCC and game-art workflows. It exports geometry, material data, and a baked paint texture atlas. |
| OBJ vertex colors | Slicers and pipelines that prefer per-vertex RGB data. |
| GLB | Portable animated assets for game engines and viewers, with object hierarchies, transform clips, PBR materials, texture atlases, metallic/roughness, glass, and emissive data where available. Geometry and animated positions are converted to meters. |
| USDZ | Apple-oriented 3D viewing and sharing workflows, with geometry converted to meters. |
| PNG | A presentation snapshot using the current scene, camera, and render settings. |
OBJ coordinates remain in the selected project unit, and the exported file identifies that unit. Changing the unit preference does not rescale the scene itself.
GLB preserves visible objects as individual hierarchy nodes and exports translation, rotation, and scale animation channels with their object pivots. Ping-pong clips become complete forward-and-reverse cycles. Compatible per-item clips are also combined into an All Items take for viewers that play the first animation, while the individual takes remain available.
Before exporting
- Inspect the model for open boundaries, intersecting faces, or normal issues.
- Use Cleanup Mesh or the targeted repair tools when needed.
- Check the active UV map and pack its islands before exporting a textured asset.
- Hide any scene objects you do not want to export; hidden objects are skipped by OBJ export.
- Confirm the document's Units setting, especially before STL, GLB, or USDZ export.
- For a smoothed result, use Sub-D preview or freeze it into editable geometry if the next workflow needs the dense mesh itself.
For 3D printing, favor clean closed geometry and use STL. For game props and textured visual assets, OBJ or GLB will usually be the better starting point.
Continue with Export and check a game asset for unit, material, hierarchy, and animation checks, with a checked painted-door GLB example.