Paint, materials, and UVs
Forge lets you finish a model in the same workspace where you created it. Create a reusable texture layout in the UV workspace, then choose a palette material in Paint mode and use brush, face, or object scope depending on the kind of detail you need.
Native for macOS and iPadOS. Paint, materials, and UV tools are part of the same Forge workflow on both platforms.
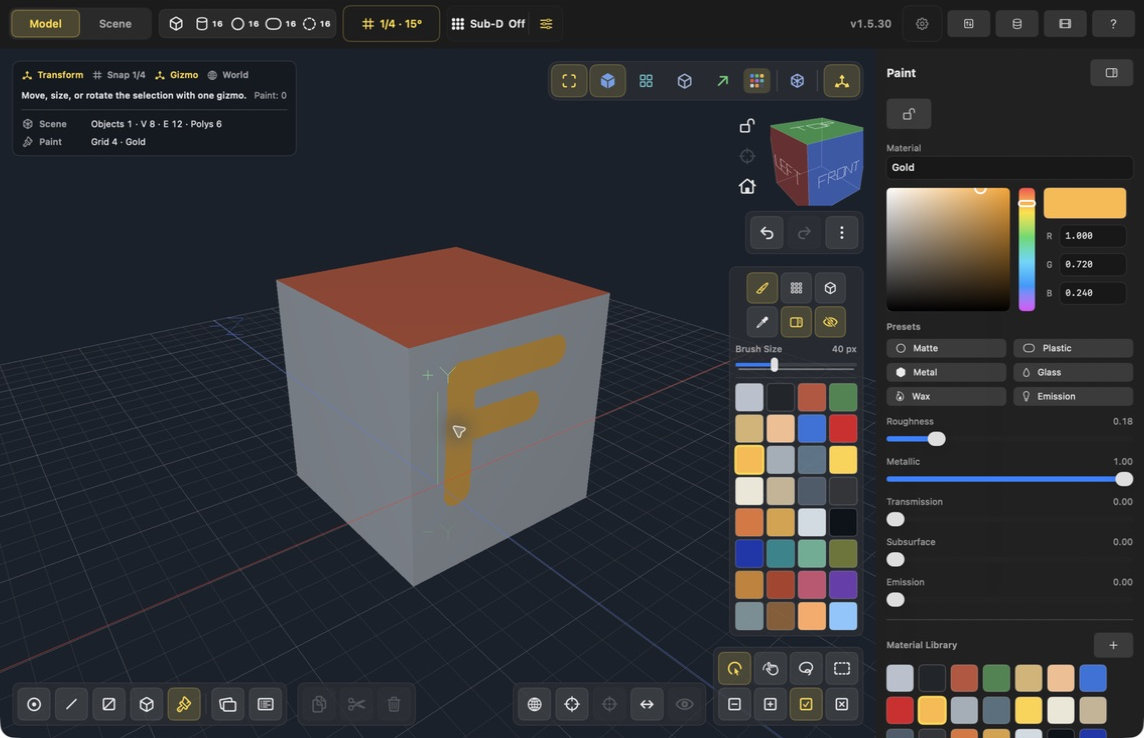
Brush painting in the Mac SwiftUI app, v1.5.30. The gold strokes are painted directly onto the surface with a 40 px brush. Click the screenshot to view it at full size.
Try it on a cube
Follow UVs and your first painted face to find the UV controls, create and pack a layout, choose Face paint scope, and color the top of a cube. The lesson includes screenshots of the actual controls and result.
Paint continuous brush strokes
- Choose Paint mode using the paintbrush in the bottom toolbar. If the UV panel is open, toggle its toolbar button off to show the Paint controls.
- In the floating palette, choose Brush scope—the pointed paintbrush beside the Face and Object buttons.
- Choose a material from the palette or Material Library. The example above uses Gold.
- Adjust Brush Size. The screenshot uses 40 px for broad strokes; reduce it for finer details.
- Drag across the model surface to paint. Strokes follow the pointer or Pencil continuously, and each gesture applies immediately. Use Undo to remove a stroke.
Brush Size controls the texture brush footprint; the modeling snap-grid spacing does not limit painting to blocks. Use Face scope to assign a material to an entire face in one click, or Object scope for a whole object. Those scopes are separate from freehand brush painting.
Materials and paint
- Apply Material assigns the active material to selected faces or objects.
- Clear Material removes a face-level material override without deleting the material from the palette.
- Brush painting uses the object's full-resolution 1024² material atlas. Brush Size ranges from single-texel details to broad strokes, and fast Pencil or pointer input is interpolated into continuous lines.
- Clear Paint resets the brush pattern while leaving the mesh intact.
- Use Clear All to remove both paint and material overrides from the selection.
Face and object paint scopes support lasso and box painting. Ignore Back Faces controls whether those gestures stop at visible surfaces or paint through the model.
When live symmetry is enabled, brush strokes are mirrored across the active axes. Forge resolves the geometrically mirrored counterpart even on twisted and non-planar faces.
UV maps
Each object can contain multiple named UV maps. Add a map, duplicate one as a variation, rename it, delete maps you no longer need, and choose which map is active for painting and export. Existing projects with legacy overlapping UVs remain compatible.
Seams and islands
UV seams tell Forge where the surface may split during unwrapping.
- Switch to Edge mode and select the edges where the texture should separate.
- Use Mark Seam, or use Mark Edge Loop to expand the selected edges into complete loops and mark them at once.
- Use Clear Seam, Clear Edge Loop, or Clear All Seams to revise the cuts.
- Toggle Show UV Seams when you want to hide the viewport overlay without changing the stored seams.
Select UV Island expands the current vertex, edge, or face selection to every face in the same seam-delimited island.
Unwrap and project
Unwrap Selection unfolds the selected faces using marked seams or the selection boundary. Unwrap All rebuilds the layout for the complete object. Seam-aware chart unfolding is the best general workflow for connected box-like and curved meshes.
Projection commands provide faster starting points for suitable forms:
- Planar for flat panels and surfaces viewed from one direction.
- Box for hard-surface and box-like objects.
- Cylinder for pipes, columns, and wrapped side walls.
- Sphere for rounded forms.
- Smart UV for automatic chart creation.
Pack and adjust islands
Use Pack Selection or Pack All to arrange islands inside the texture tile. Pack to Others fits selected islands around the unselected layout. Set a Pixel Margin to leave safe spacing between islands, enable Normalize Islands for consistent texel scale, and use Allow Rotation when islands may turn for a tighter fit.
Selected faces show a live UV preview and axis overlay in the viewport. Use Rotate 90, Flip U, Flip V, Reset, and Fit to repair or orient the mapping. A multi-face 90-degree rotation uses one pivot for the complete selection, keeping the island together. Copy and Paste speed up repeated parts with matching face layouts.
The active UV layout and baked base-color/PBR textures are retained for textured OBJ, GLB, and USDZ exports.
For a complete seam-to-brush workflow with inspection checkpoints, follow Texture a prop.