Make a raised panel
Turn the top of a box into a smaller raised block. This teaches the difference between Inset, which makes a border on the surface, and Extrude, which adds connected side walls and moves the new face outward.
Start with: a new document containing the default cube, with no earlier mesh edits. The screenshots use its default 2 × 2 × 2 size and the Mac v1.5.30 interface. Values below refer to the default model setup.
New to the controls? Match the starting state and learn selection/number entry before continuing.
1. Select the top face
- Choose Face mode in the bottom toolbar: the diagonally divided square.
- Choose Replace Selection, the checked square near the bottom right.
- Click the cube's top surface away from the transform handles.
- Check that only this surface is yellow and the upper-left display says Face: 1. If it remains Face: 0, click farther from the colored handles or temporarily disable the gizmo.
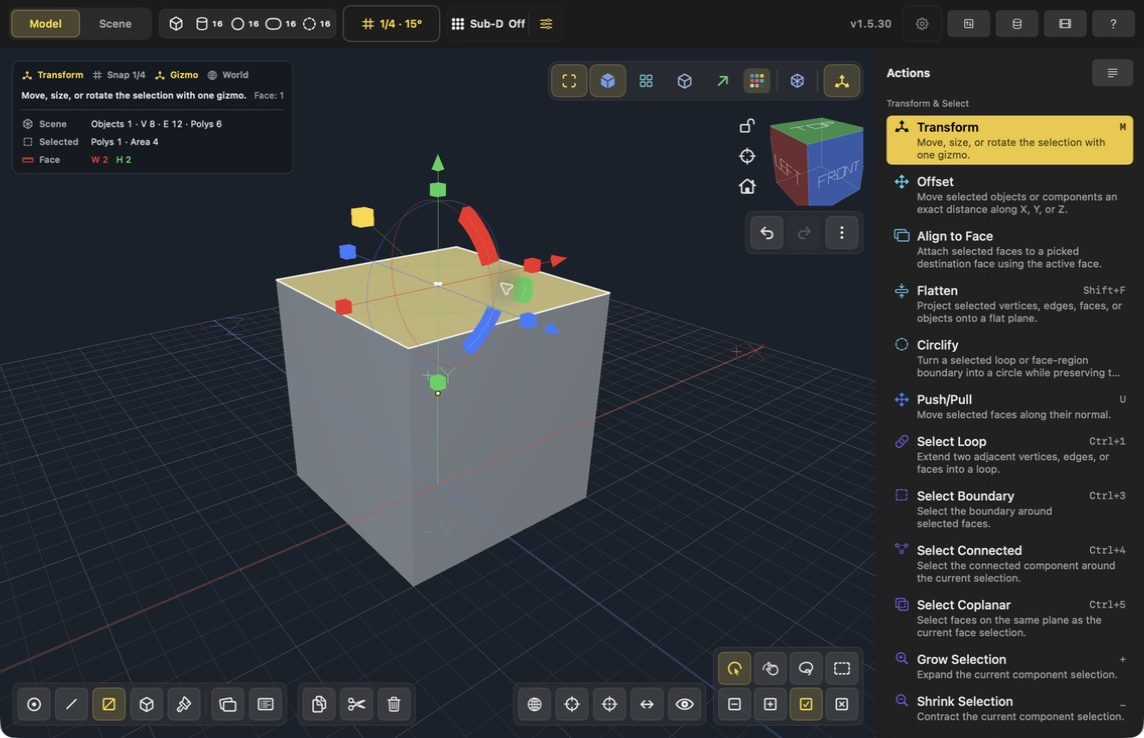
Starting selection. Clicking the cube in Object mode would select the entire cube; this lesson needs its top face.
2. Inset a border
- Choose Inset under Mesh Edit in Actions. On Mac, I starts it when no text field is being edited.
- Set Amount to 0.250 in the floating Inset card and press Return. Leave Inset per face enabled for this single-face example.
- Look for a smaller top face with an even border around it. The cube has not become taller.
- In Actions, click Apply Inset once, then Done. Scroll the panel to the controls below Detail if necessary.
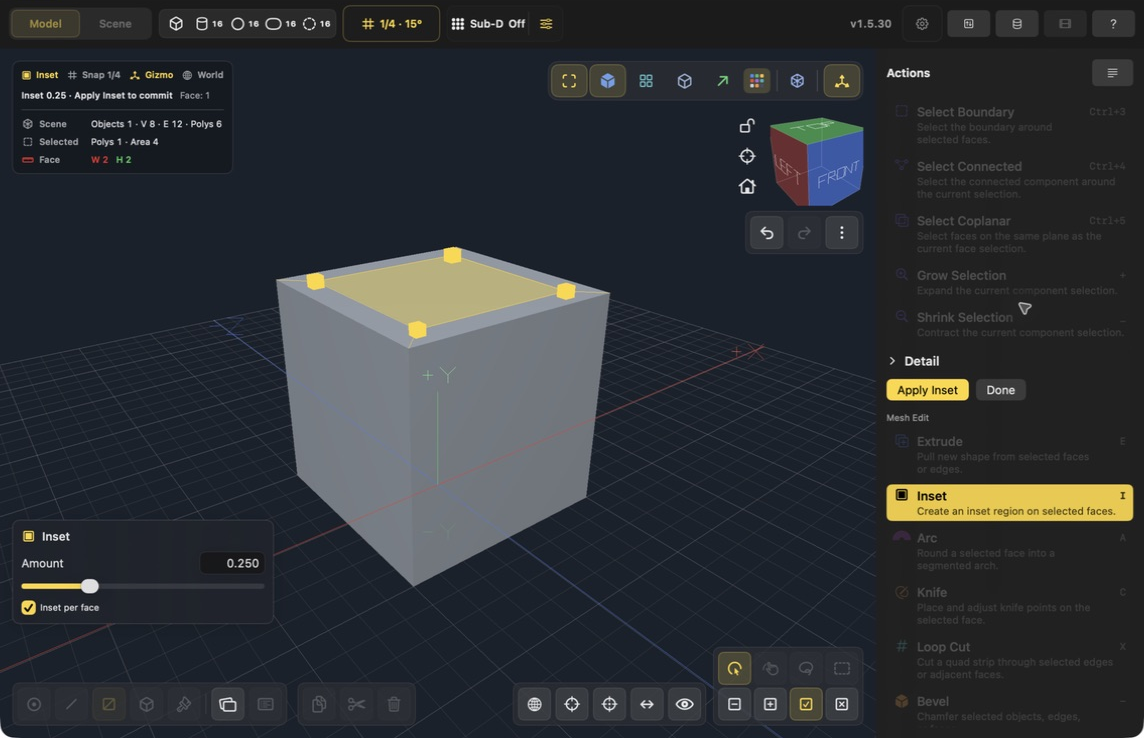
The floating card changes the preview. Apply Inset commits the border; Done returns to Transform. The inner face remains selected.
What Amount means: on this simple square, 0.25 moves each edge inward by 0.25. A 2-unit-wide top becomes a 1.5-unit-wide inner face. Start with a small amount: a border cannot grow indefinitely inside a small face.
What Inset per face means: with several selected faces, enabled creates a separate inset on each face. Disabled treats connected coplanar faces as a region. A coplanar region is a set of neighboring faces lying on the same flat plane.
3. Extrude the inner face
- Keep the inset's inner face selected.
- Choose Extrude under Mesh Edit (Mac shortcut E).
- Set Amount to 0.75 and press Return. Leave Extrude per face off for this example.
- The smaller face rises above the surrounding border, with new side walls joining it to the original box.
- Click Apply Extrude once, then Done.
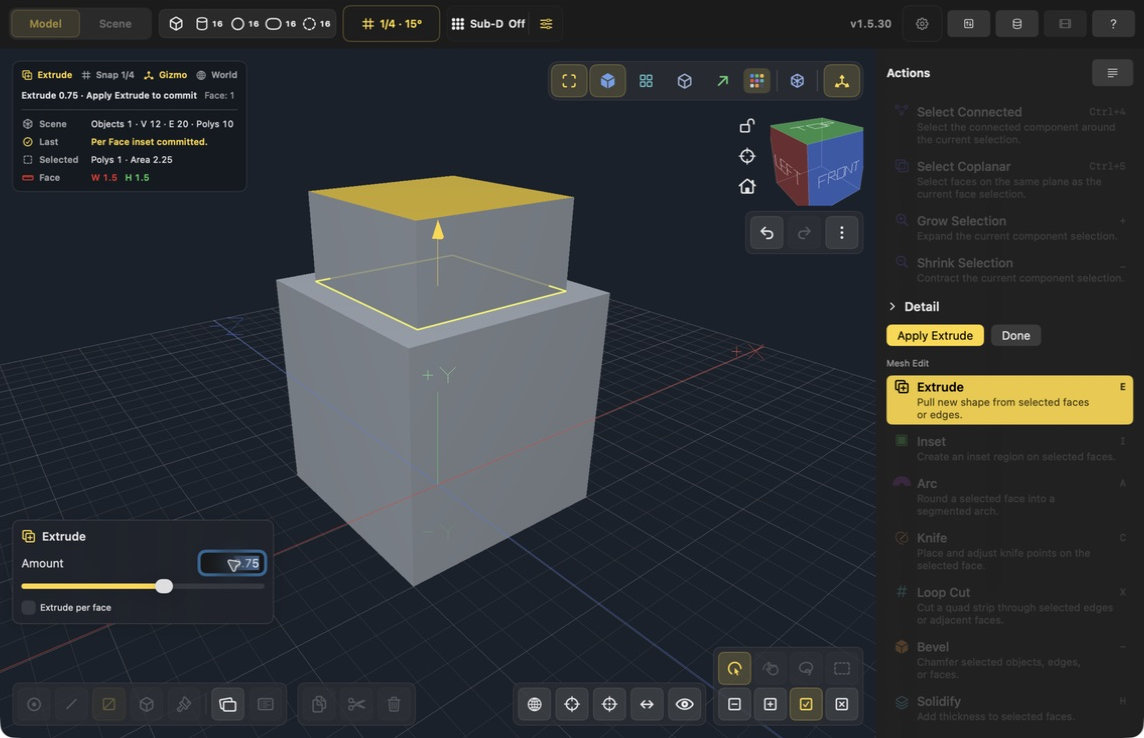
The positive amount moves outward along the face normal—the direction perpendicular to the face. On this top face, outward is upward.
4. Check the result
Use Shaded + Wire in the viewport's upper display strip to see the newly added edges. You should have one connected object with a flat border and a smaller raised block, not two separate boxes.
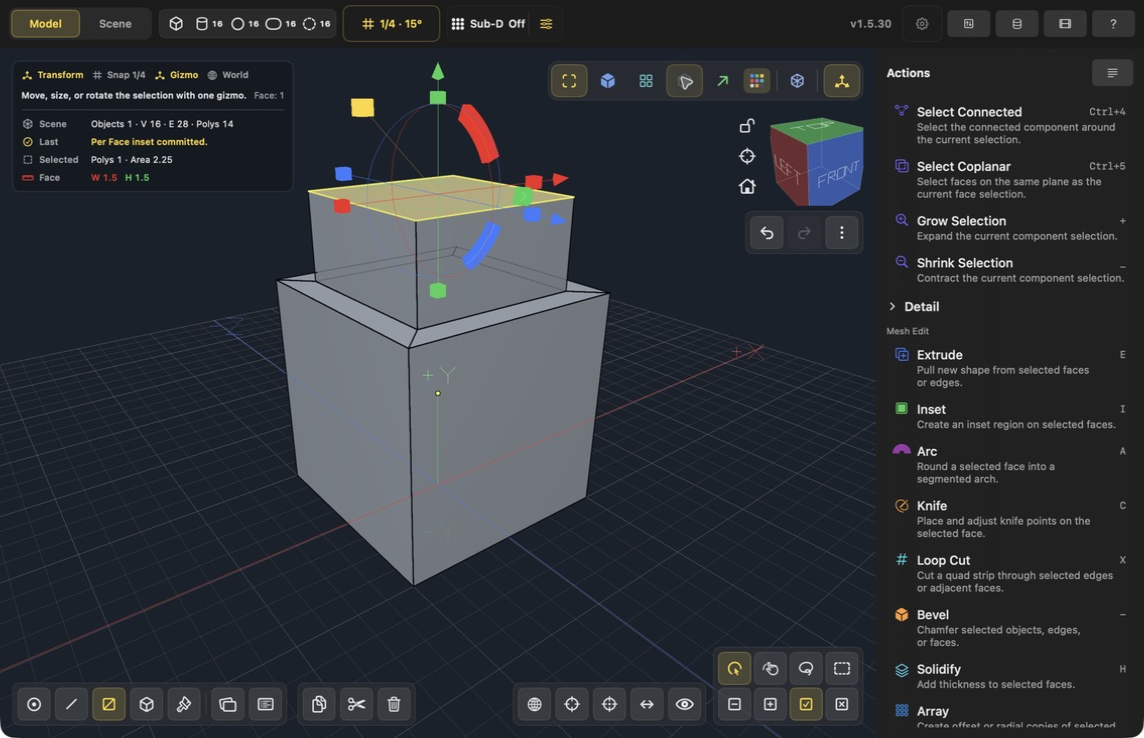
Finished mesh after Apply and Done. The example has 14 faces, compared with the original cube's 6.
Which tool should I use next time?
| Tool | How it changes this example | Useful for |
|---|---|---|
| Inset | Makes an inner face and surrounding border | Frames, panel margins, rims |
| Extrude | Adds geometry between the original surface and a new face | Ledges, raised details, connected extensions |
| Push/Pull | Moves the selected face along its normal without the same extrusion step | Adjusting the depth or height of an existing feature |
| Bevel | Replaces sharp edges with narrow chamfer faces | Softening a block's corners |
| Solidify | Gives a thin surface thickness | Turning a plane or shell into a wall or panel |
Try a variation: start again from a fresh cube, make the same inset, then use a small negative Extrude amount such as -0.25 to make a recessed panel. Inspect the preview before applying; keep the recess shallow enough to avoid the opposite side of the box.
Troubleshooting
- Inset or Extrude is missing: switch to Face mode and select a face. Tools farther down the Actions list require scrolling.
- The next tool is dimmed: click Done on the active tool after applying it.
- There are several stacked sections: Extrude was applied more than once. Undo the extra extrusion.
- The entire top rises without a border: the inset was not committed, or the outer face was selected instead of the inner face.
- The shortcut types a letter into Amount: press Return and use the tool button in Actions instead.
Start a new document for Round and repeat a part, or return to Learn by example.