Center and align objects
To center two objects on an axis, give their centers the same Position value on that axis. Work with one object selected at a time in Object mode.
There is no dedicated “align selected object centers” button in Transform. Align to Face attaches mesh faces and only appears with a suitable Face-mode selection. Origin → Center changes an object's pivot without moving its geometry.
Find the Position controls
- Choose Object mode: the cube icon in the bottom toolbar.
- Choose Replace Selection (the checked square near the bottom right), then click the object you want to use as the reference.
- Choose Transform in the right-hand Actions panel (shortcut M on Mac).
- Expand Detail underneath the transform tools. If you only see icons, cycle the Actions header's layout button until names and descriptions appear.
- Find Position. Its three fields are X, Y, Z, from left to right, with red, green, and blue outlines.
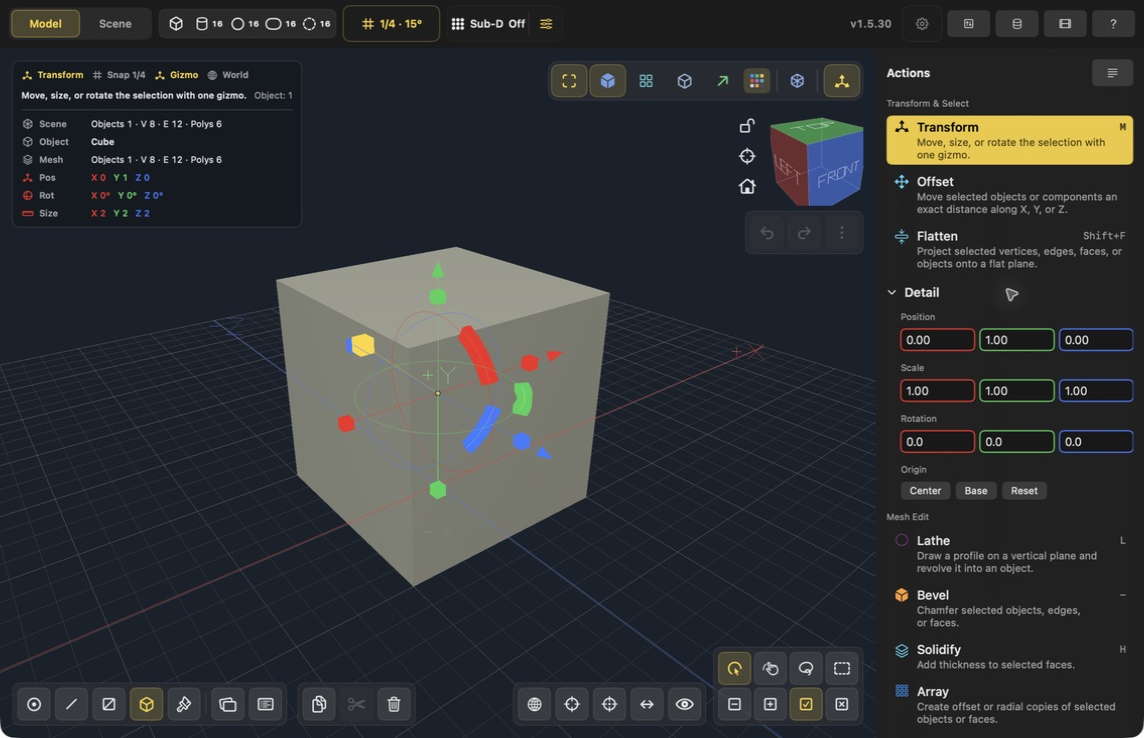
Actual SwiftUI interface, Mac v1.5.30. Position is the first row under Detail. Center, Base, and Reset belong to the separate Origin section.
Set up the two-box example
For a reproducible practice scene, choose File → New and keep its default cube. Using the Position fields above, set that cube to X = −3, Y = 1, Z = 0. Click the box primitive in the top toolbar once to add a second box. It becomes selected; set its Position to X = 3, Y = 4, Z = 0. Keep both boxes at Scale 1, 1, 1 and Rotation 0, 0, 0.
To enter a number on Mac, click the field, press Command-A, type the replacement, then Return. Check Objects 2 in the scene summary. Choose Front on the View Cube, then click the house / Look At Center button below it if only the selected box is visible. You should now see the lower box on the left and the upper box on the right.
Example: center a box above another box
This example uses two unparented, unrotated boxes in the same model. The lower box stays in place; the upper box moves horizontally until their centers line up. Matching only X preserves the vertical gap.
- Select the lower box alone. For an imported or edited object whose pivot may be off-center, use Origin → Center first. This places the origin at the mesh center without moving the mesh.
- Read its Position X. In this example it is -3.
- Select the upper box alone. If needed, also use Origin → Center on this box before editing Position.
- Enter -3 in the upper box's Position X and press Return. Keep Y unchanged. Here Y is 4 and Z is 0.
- For alignment in depth too, match Position Z as well. Choose Front on the View Cube to check horizontal alignment, then Look At Center if the view crops out one box.
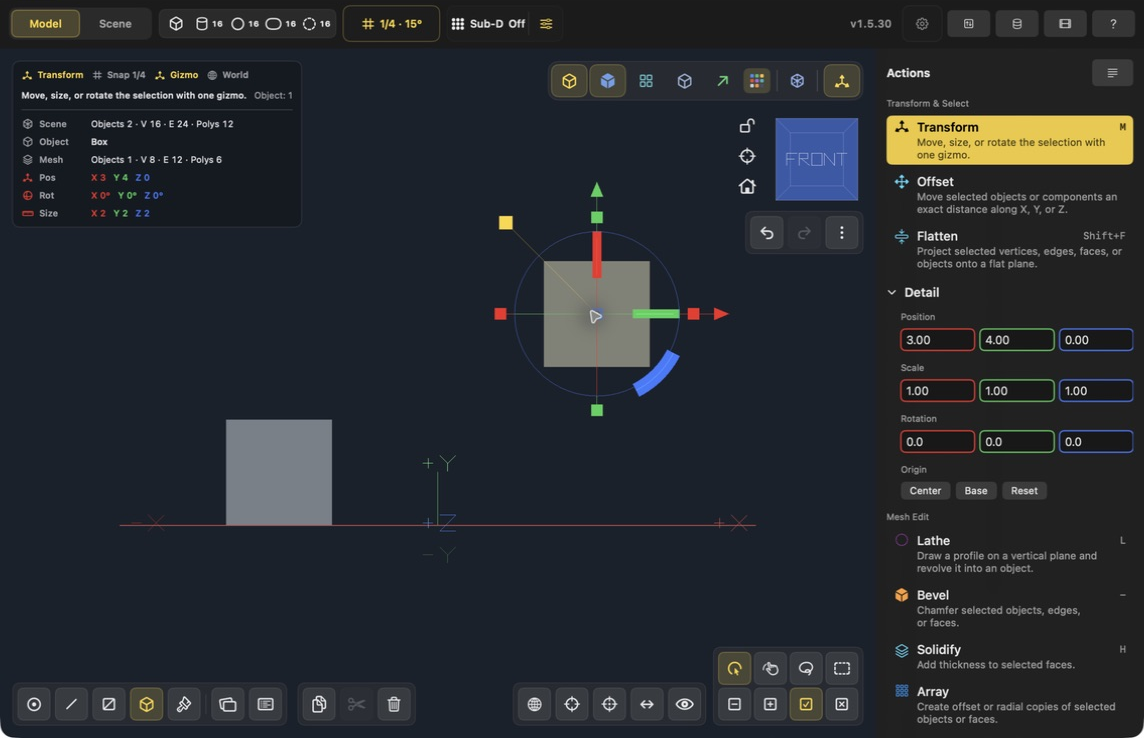
Before: the upper box has X = 3. The lower box has X = -3.
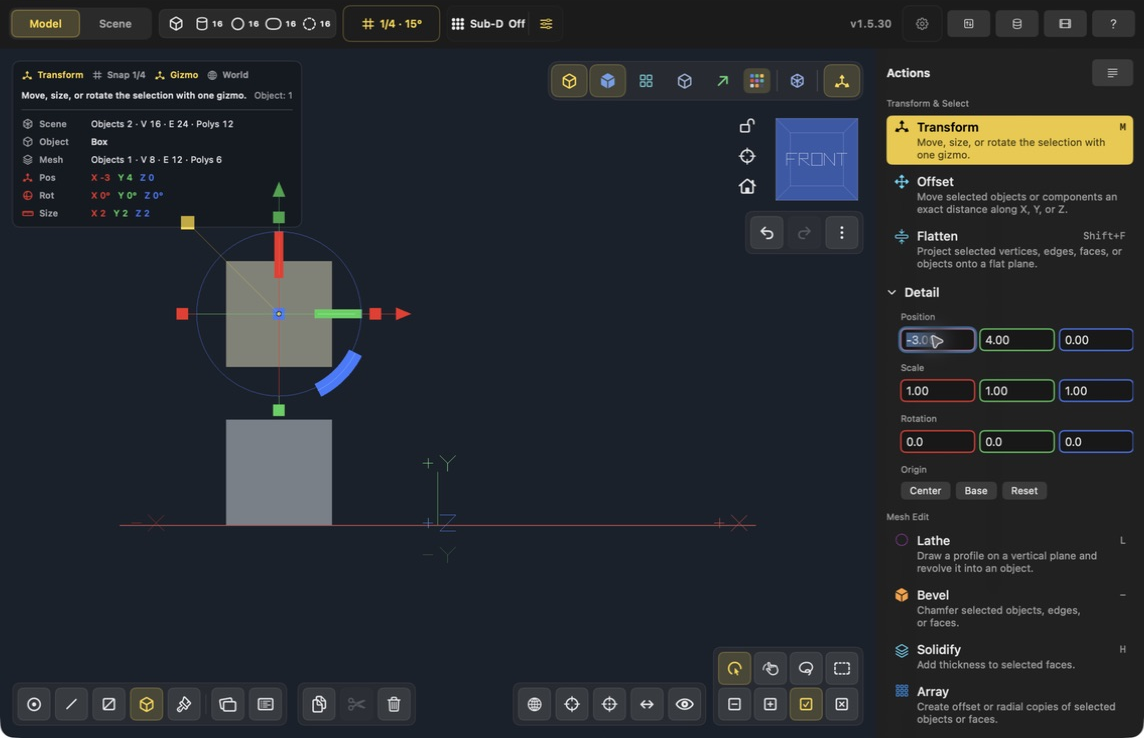
After: both boxes have X = -3. Only the upper box moved; its Y and Z values stayed unchanged. The camera is unchanged between these screenshots.
The edit is committed when you press Return. There is no Apply/Done step for these Position fields. Use Undo to reverse a committed edit.
Which coordinates should match?
| Desired result | Match these Position fields |
|---|---|
| Same left/right center in Front view | X |
| Same height | Y |
| Same depth | Z |
| Center one object above another, preserving height | X and Z |
| Put both centers at the same point | X, Y, and Z; the objects may overlap |
These are object-origin coordinates. Center each origin first if you want mesh-center alignment. For objects under different parents, matching local Position values does not necessarily match world position; use this recipe with unparented objects or objects sharing the same parent coordinate system.
Why the other controls do not do this
- Transform with several objects selected is useful for moving the selection together. For this recipe, select the reference and moving object separately.
- Origin → Center moves the origin to the mesh center; the visible object stays in place.
- Transform Center → Selection places the gizmo at the selection pivot; it does not bring objects together.
- Offset moves a selection by a distance and preserves relative spacing.
- Align to Face needs selected faces and an active source face, followed by a destination face picked in the viewport. See face attachment.
The screenshot layout is from the Mac app. On iPad, look for the same named tools and selection modes; toolbar arrangement depends on available space.