Make a window through a wall
Use Knife to define a window region, then Cut Through to open it through the wall. The result includes the inside faces of the opening, not just a missing front face.
This lesson uses a fresh default cube in the Model workspace of the Mac SwiftUI app, v1.5.30. Start in Object mode. Screenshots show the real operation, with the macOS title bar cropped. Click an image to enlarge it; numbered markers are documentation callouts, not app controls.
New to the controls? Match the starting state and learn selection/number entry before continuing.
1. Turn the cube into a wall
Choose Transform in Actions and expand Detail. Set these values, pressing Return after editing each field:
| Row | X | Y | Z |
|---|---|---|---|
| Position | 0 | 1.5 | 0 |
| Scale | 2 | 1.5 | 0.25 |
| Rotation | 0 | 0 | 0 |
The default cube is 2 units wide, so these scale factors produce a wall 4 wide × 3 high × 0.5 thick. Position Y = 1.5 places its base at ground level. Choose Front on the View Cube to frame the wall straight on.
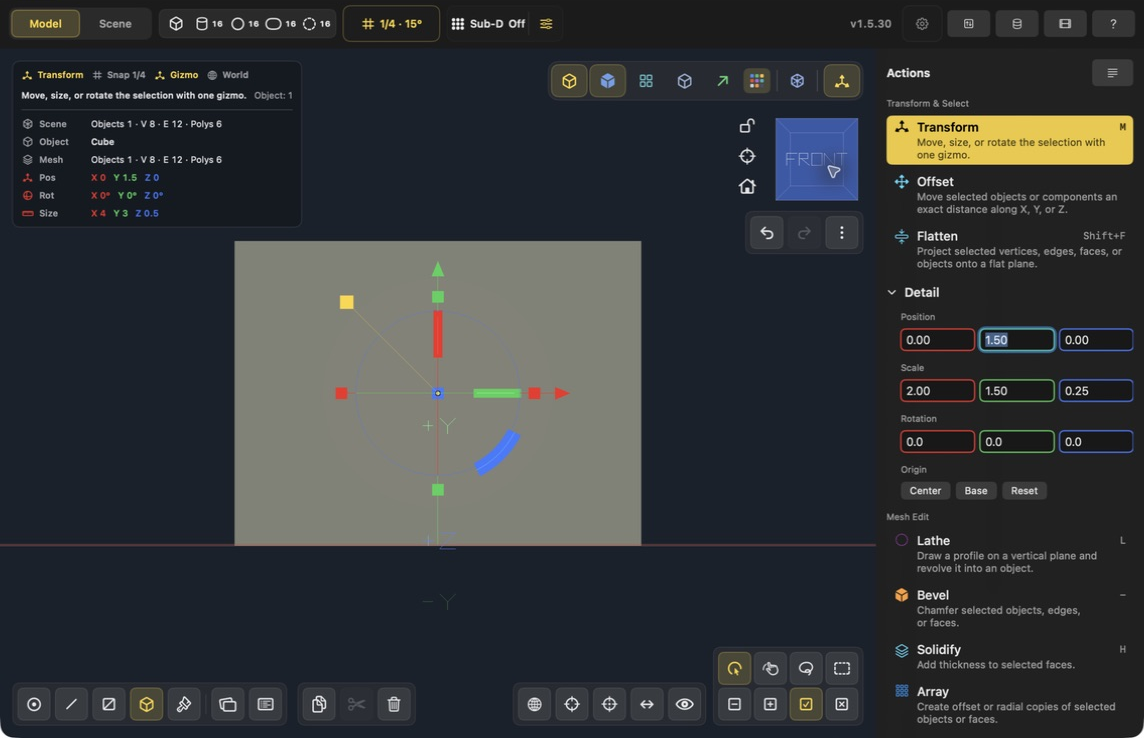
- Position places the wall; these are coordinates.
- Scale changes its proportions; these are multipliers, not final dimensions.
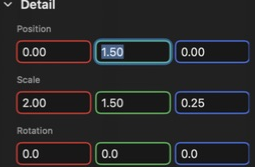
Control close-up. Read each row left to right as X, Y, Z.
2. Draw the window outline
- Choose Face mode in the bottom toolbar and Replace Selection near the bottom right.
- Click the wall's front face. Check that the status display says Face: 1.
- Choose Knife in Actions under Mesh Edit. Scroll down the panel if necessary.
- Click four points inside the face in order: top left, top right, bottom right, bottom left. Keep every point inside the wall boundary and trace around the perimeter without crossing the lines.
- Inspect the rectangular preview. The example makes a centered opening approximately 2 wide × 1.5 high. Grid snapping can shift a clicked point onto a nearby snap position.
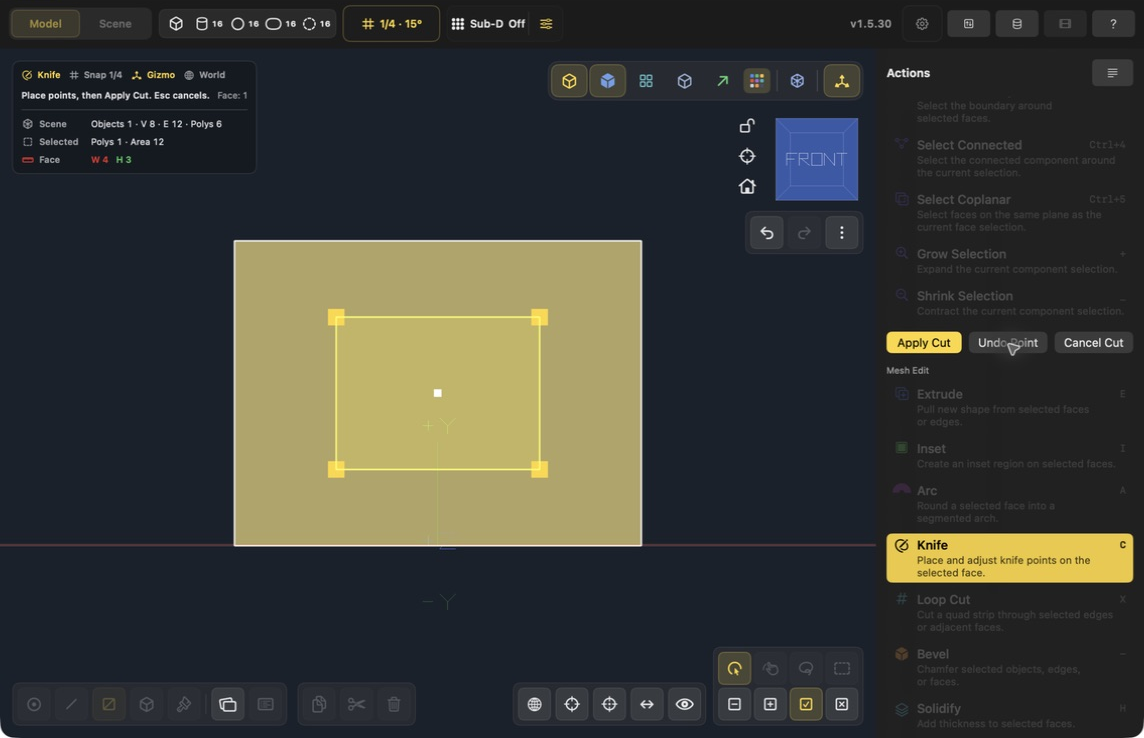
- Window outline: four corners define the new inner region. Use Undo Point if the latest corner is wrong, or drag a point to adjust it.
- Apply Cut: commits the surface cut. Cancel Cut abandons the current cut instead.

Knife has its own commit controls. It does not use the Apply/Done pair shown in the Inset lesson.
3. Commit the surface cut
Click Apply Cut once. Knife returns to Transform and the new inner face remains selected.
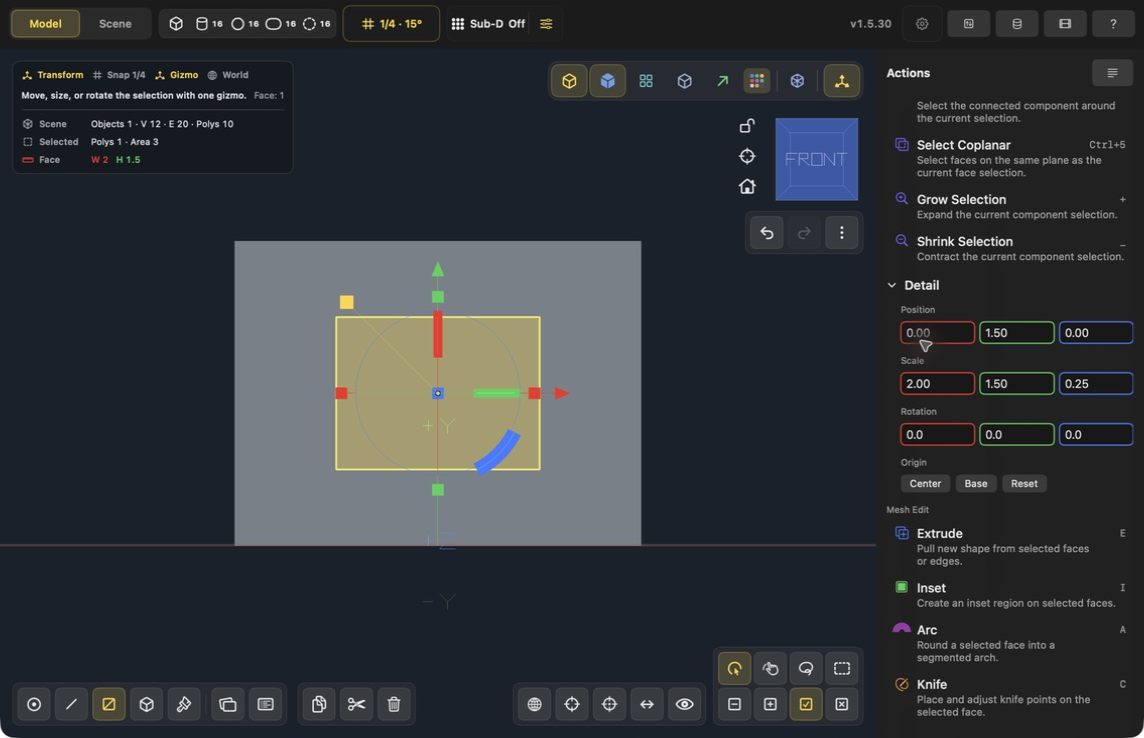
This is not a hole yet. The front face has been divided into an inner region and the surrounding wall.
If the selection was cleared, click the inner rectangle in Face mode before continuing. Do not select the entire wall object or add the surrounding faces.
4. Open the wall with Cut Through
Choose Cut Through under Mesh Edit in Actions. It runs immediately; there is no additional Apply button. In this example, the command creates four tunnel faces around the opening.
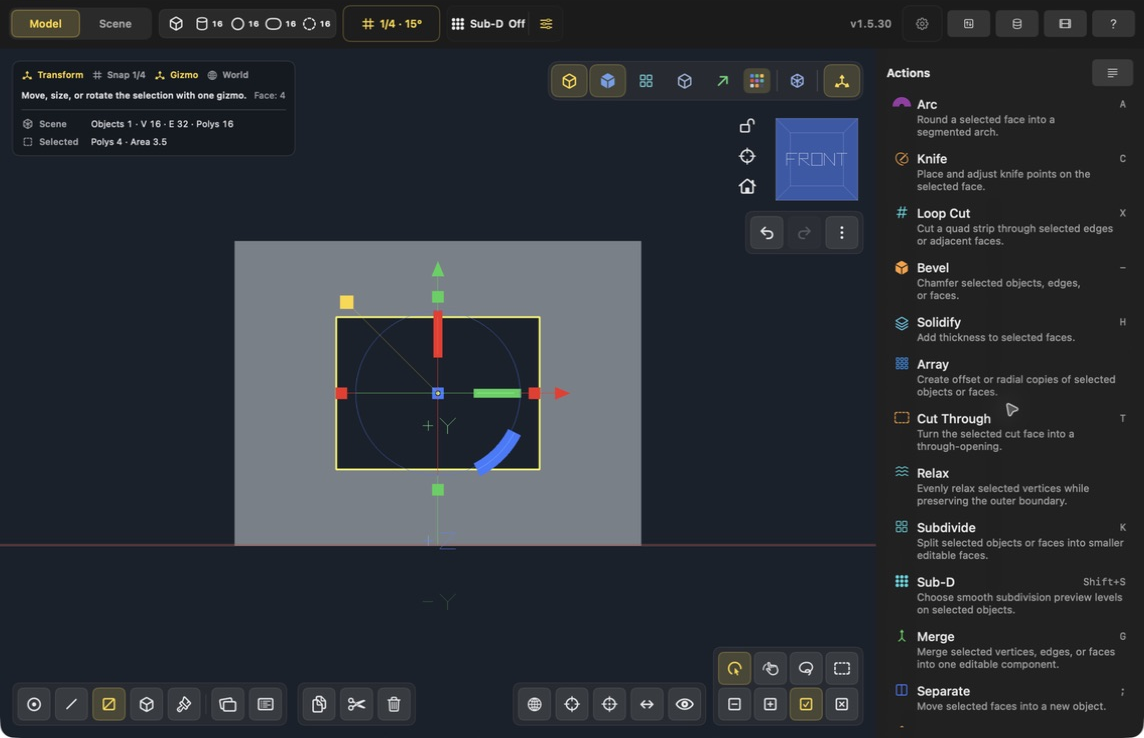
Use Deselect All, then drag the View Cube slightly to inspect the thickness from an angle:
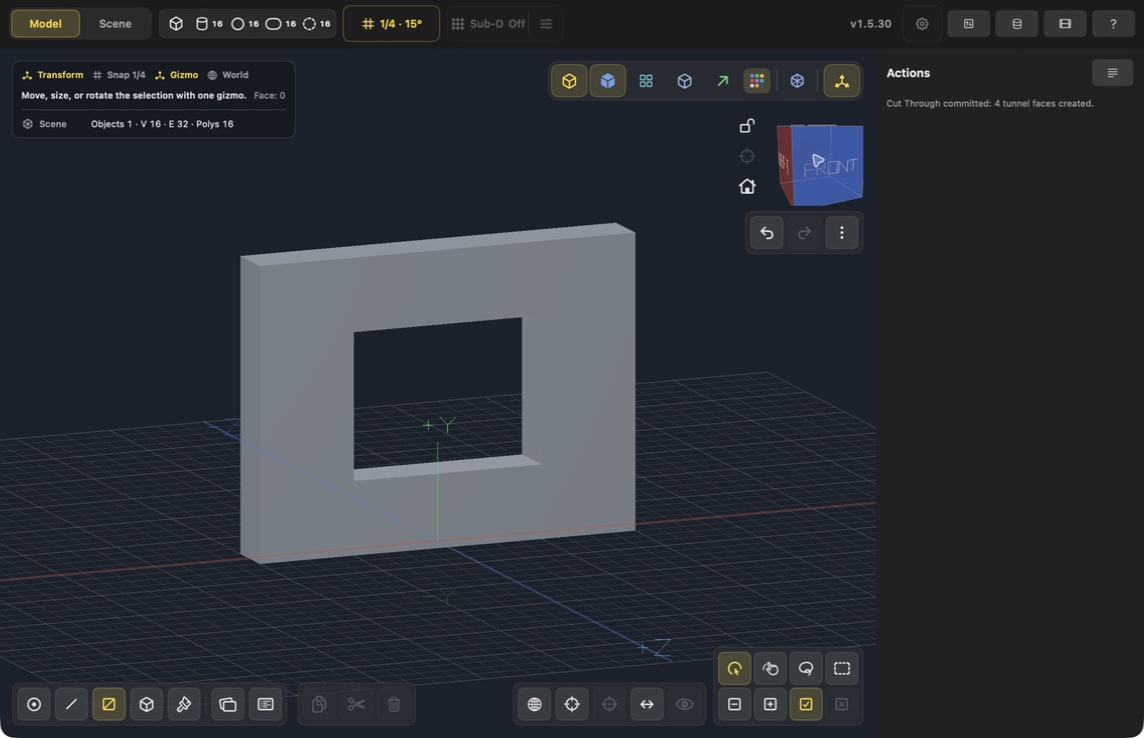
The wall remains 0.5 units thick. You can see through the opening, and its inside faces connect the front and back of the wall.
Troubleshooting
| What happened? | What to check |
|---|---|
| Knife is missing | Select a face in Face mode, then scroll Actions to Mesh Edit. |
| The outline is a line instead of a rectangle | Two points make a straight split. Use four distinct corners for this lesson. |
| The window shape is crossed or invalid | Place corners in perimeter order and keep them inside one face. Use Undo Point or Cancel Cut. |
| The rectangle is still filled after Apply Cut | This is expected. Now run Cut Through on that inner face. |
| Other tools are dimmed while drawing | Complete Knife with Apply Cut, or abandon it with Cancel Cut. |
| Cut Through does not make the intended opening | Start with the closed box from this lesson and select only the new inner region. Check the command's status message. |
| The front surface vanished but no tunnel was built | Undo the deletion and use Cut Through instead of Delete. |
For a recess that does not pass through the wall, use a small negative Extrude on the inner face instead. See the raised/recessed panel lesson.