Shape a mesh and snap a detail
These are two independent exercises: use Grab Brush for a softer silhouette, then use geometry snapping for exact point placement. Start a new document for each. Screenshots show the running Mac Forge v1.6.39 app.
1. Reshape an editable mesh
- Start with the default cube in Model, selected in Object mode (
4). - Use Subdivide (
K) three times. The cube remains box-shaped but now contains 384 faces and 386 vertices, giving the brush vertices to move. - Choose Grab Brush in Actions. It has no default shortcut.
- Adjust Radius to cover a modest part of the visible mesh, then drag a small area to change the silhouette. Work in short strokes and orbit to inspect the other sides.
- Turn on Smooth/Relax to even the visible vertices rather than translating them. Use a small stroke first.
- Undo any unwanted stroke. Choose Done to return to Transform.
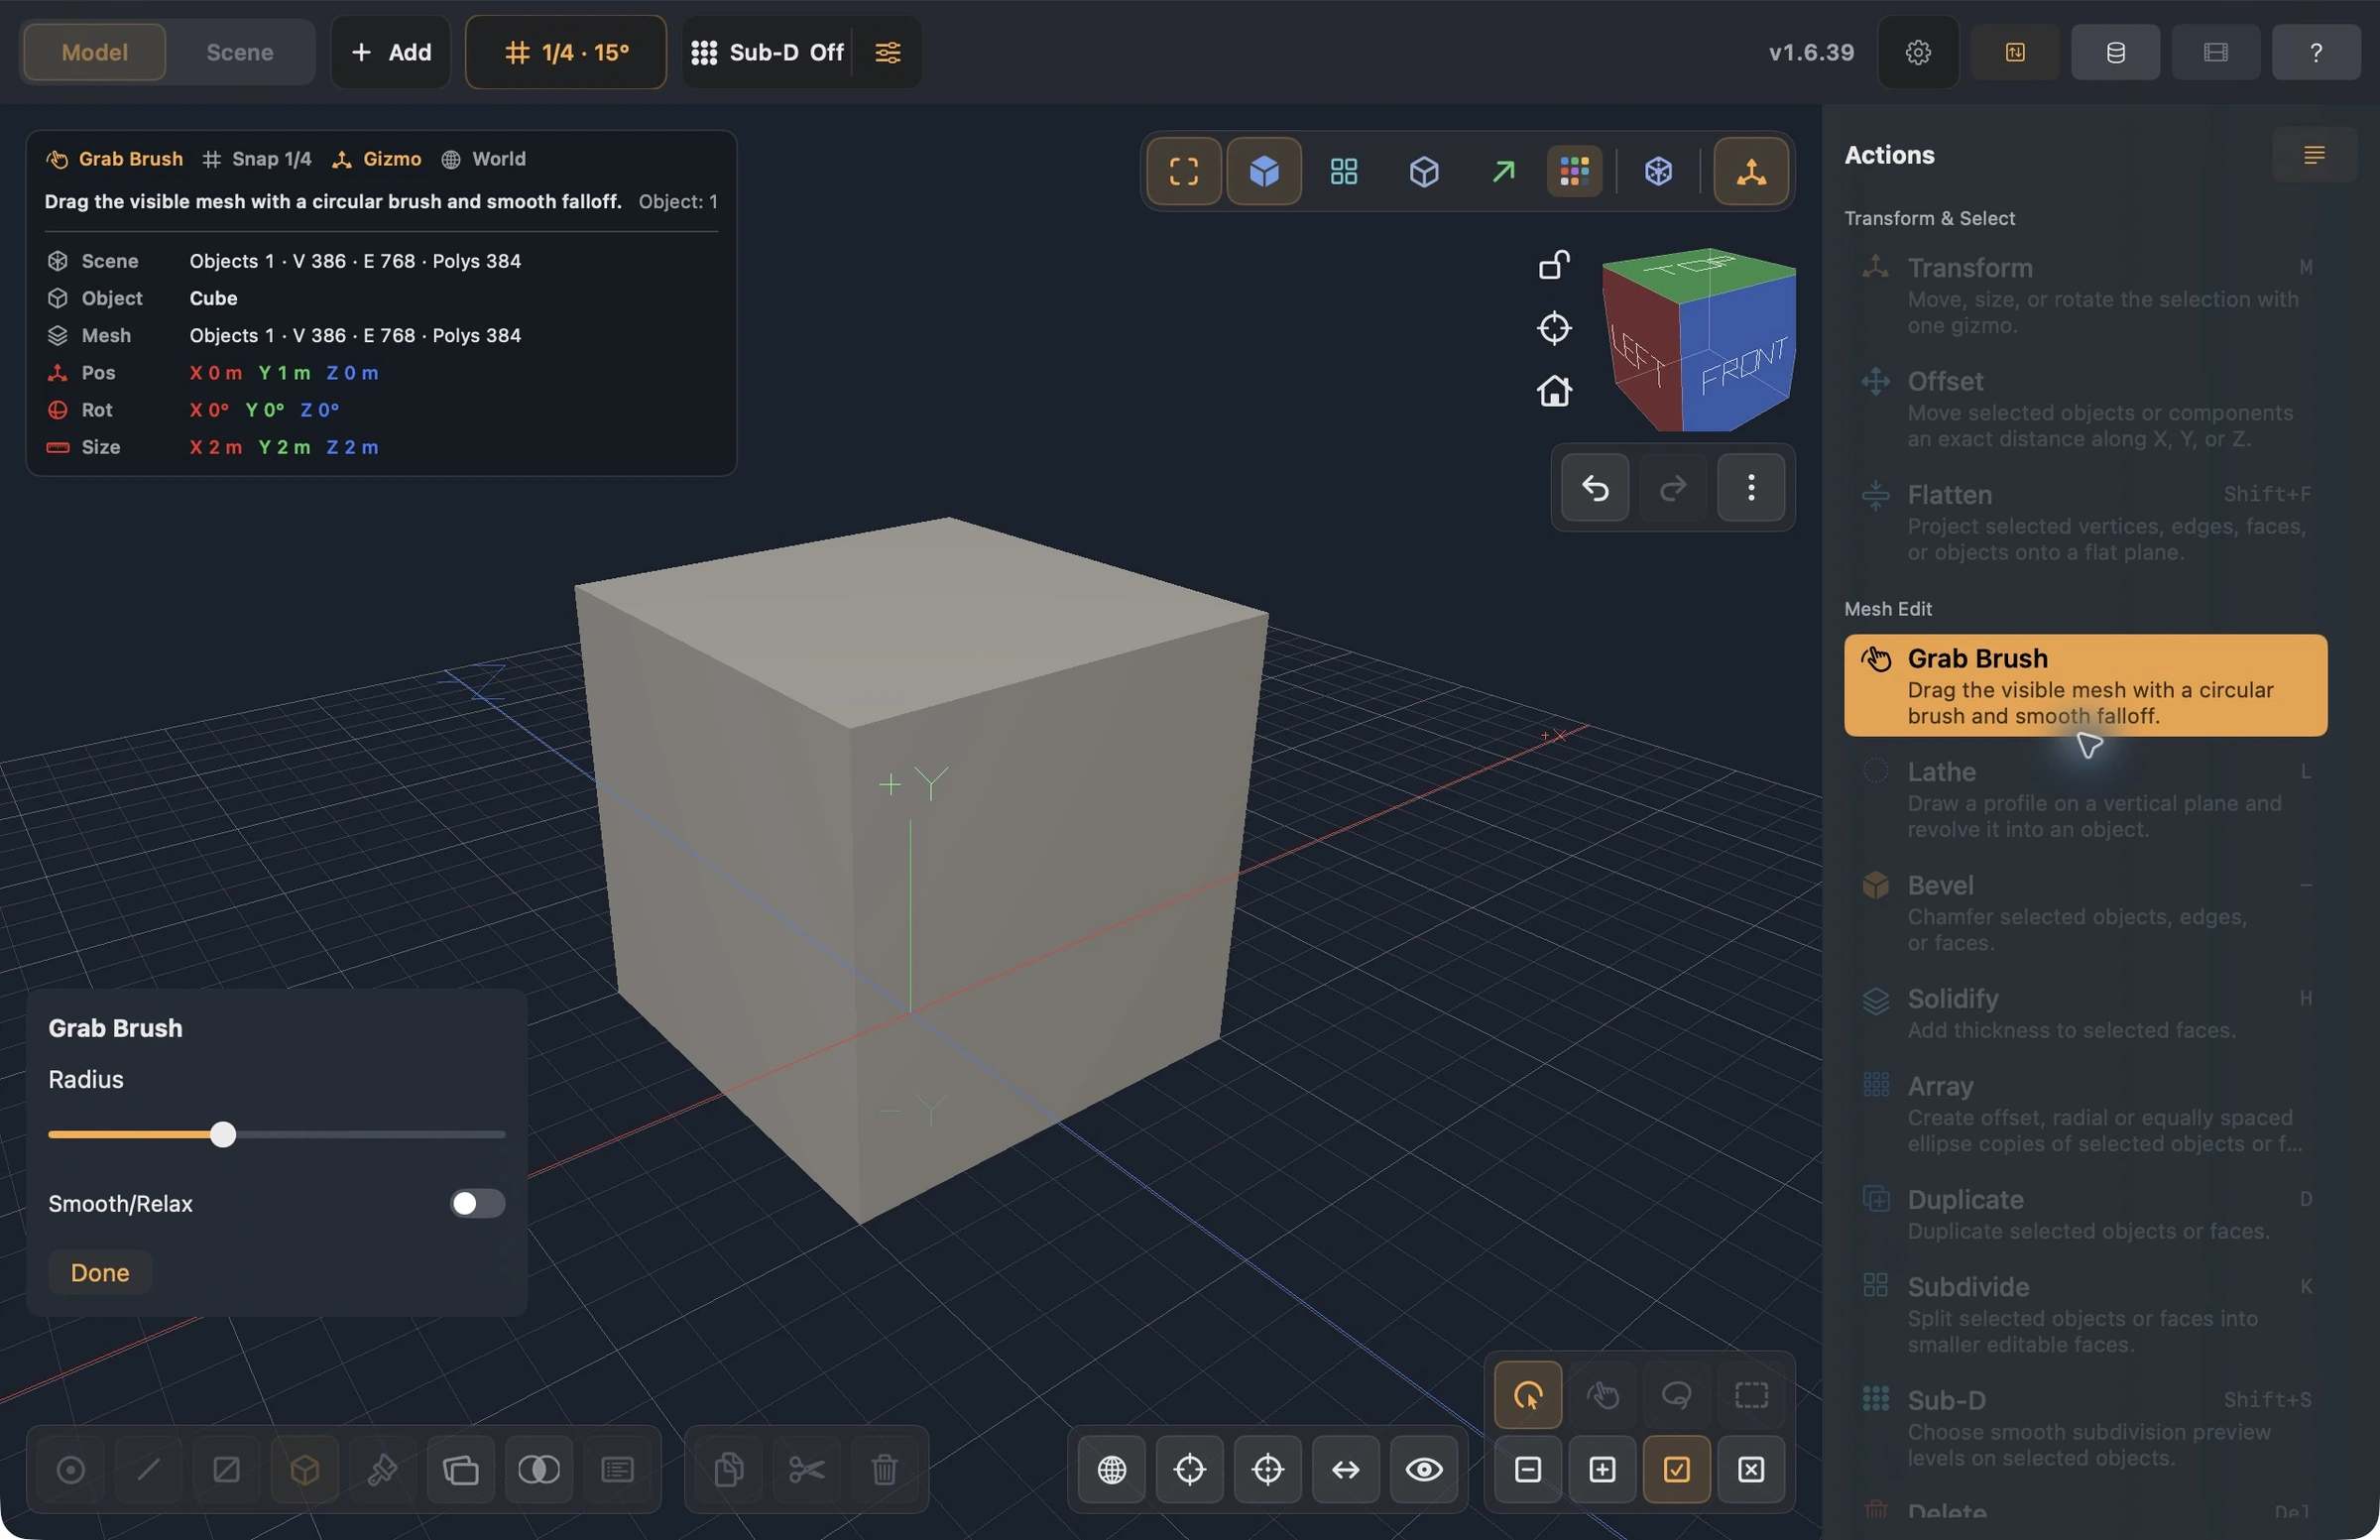
Grab Brush does not add topology, and only visible vertices inside the circular falloff are affected. A cube with only eight corners cannot produce a detailed brush deformation. This is mesh editing, not texture paint and not a separate sculpt mode.
If the object uses a Sub-D preview, Freeze Sub-D before brushing its evaluated geometry. Apply editable Booleans before brushing their result. Save a source copy if you want to retain the earlier cage or Boolean construction.
2. Snap a vertex to another object
Start again with a fresh cube. Add a second box and move it aside using Transform → Detail. For these numeric examples, choose Project units → Meters first; a Position X of 3 m separates the default cubes.
- Choose Vertex mode (
1) and select one corner on the object you want to move. - Open the top Snapping control. Enable Vertices and Edge Midpoints independently of Grid and Rotation.
- Activate Transform (
M). The active, last-selected vertex is the snap source. - Drag the selected point or a gizmo arrow, and point at a stationary target vertex on the other object. Inspect the source/target feedback before releasing.
- Undo and repeat with an edge midpoint as the target.
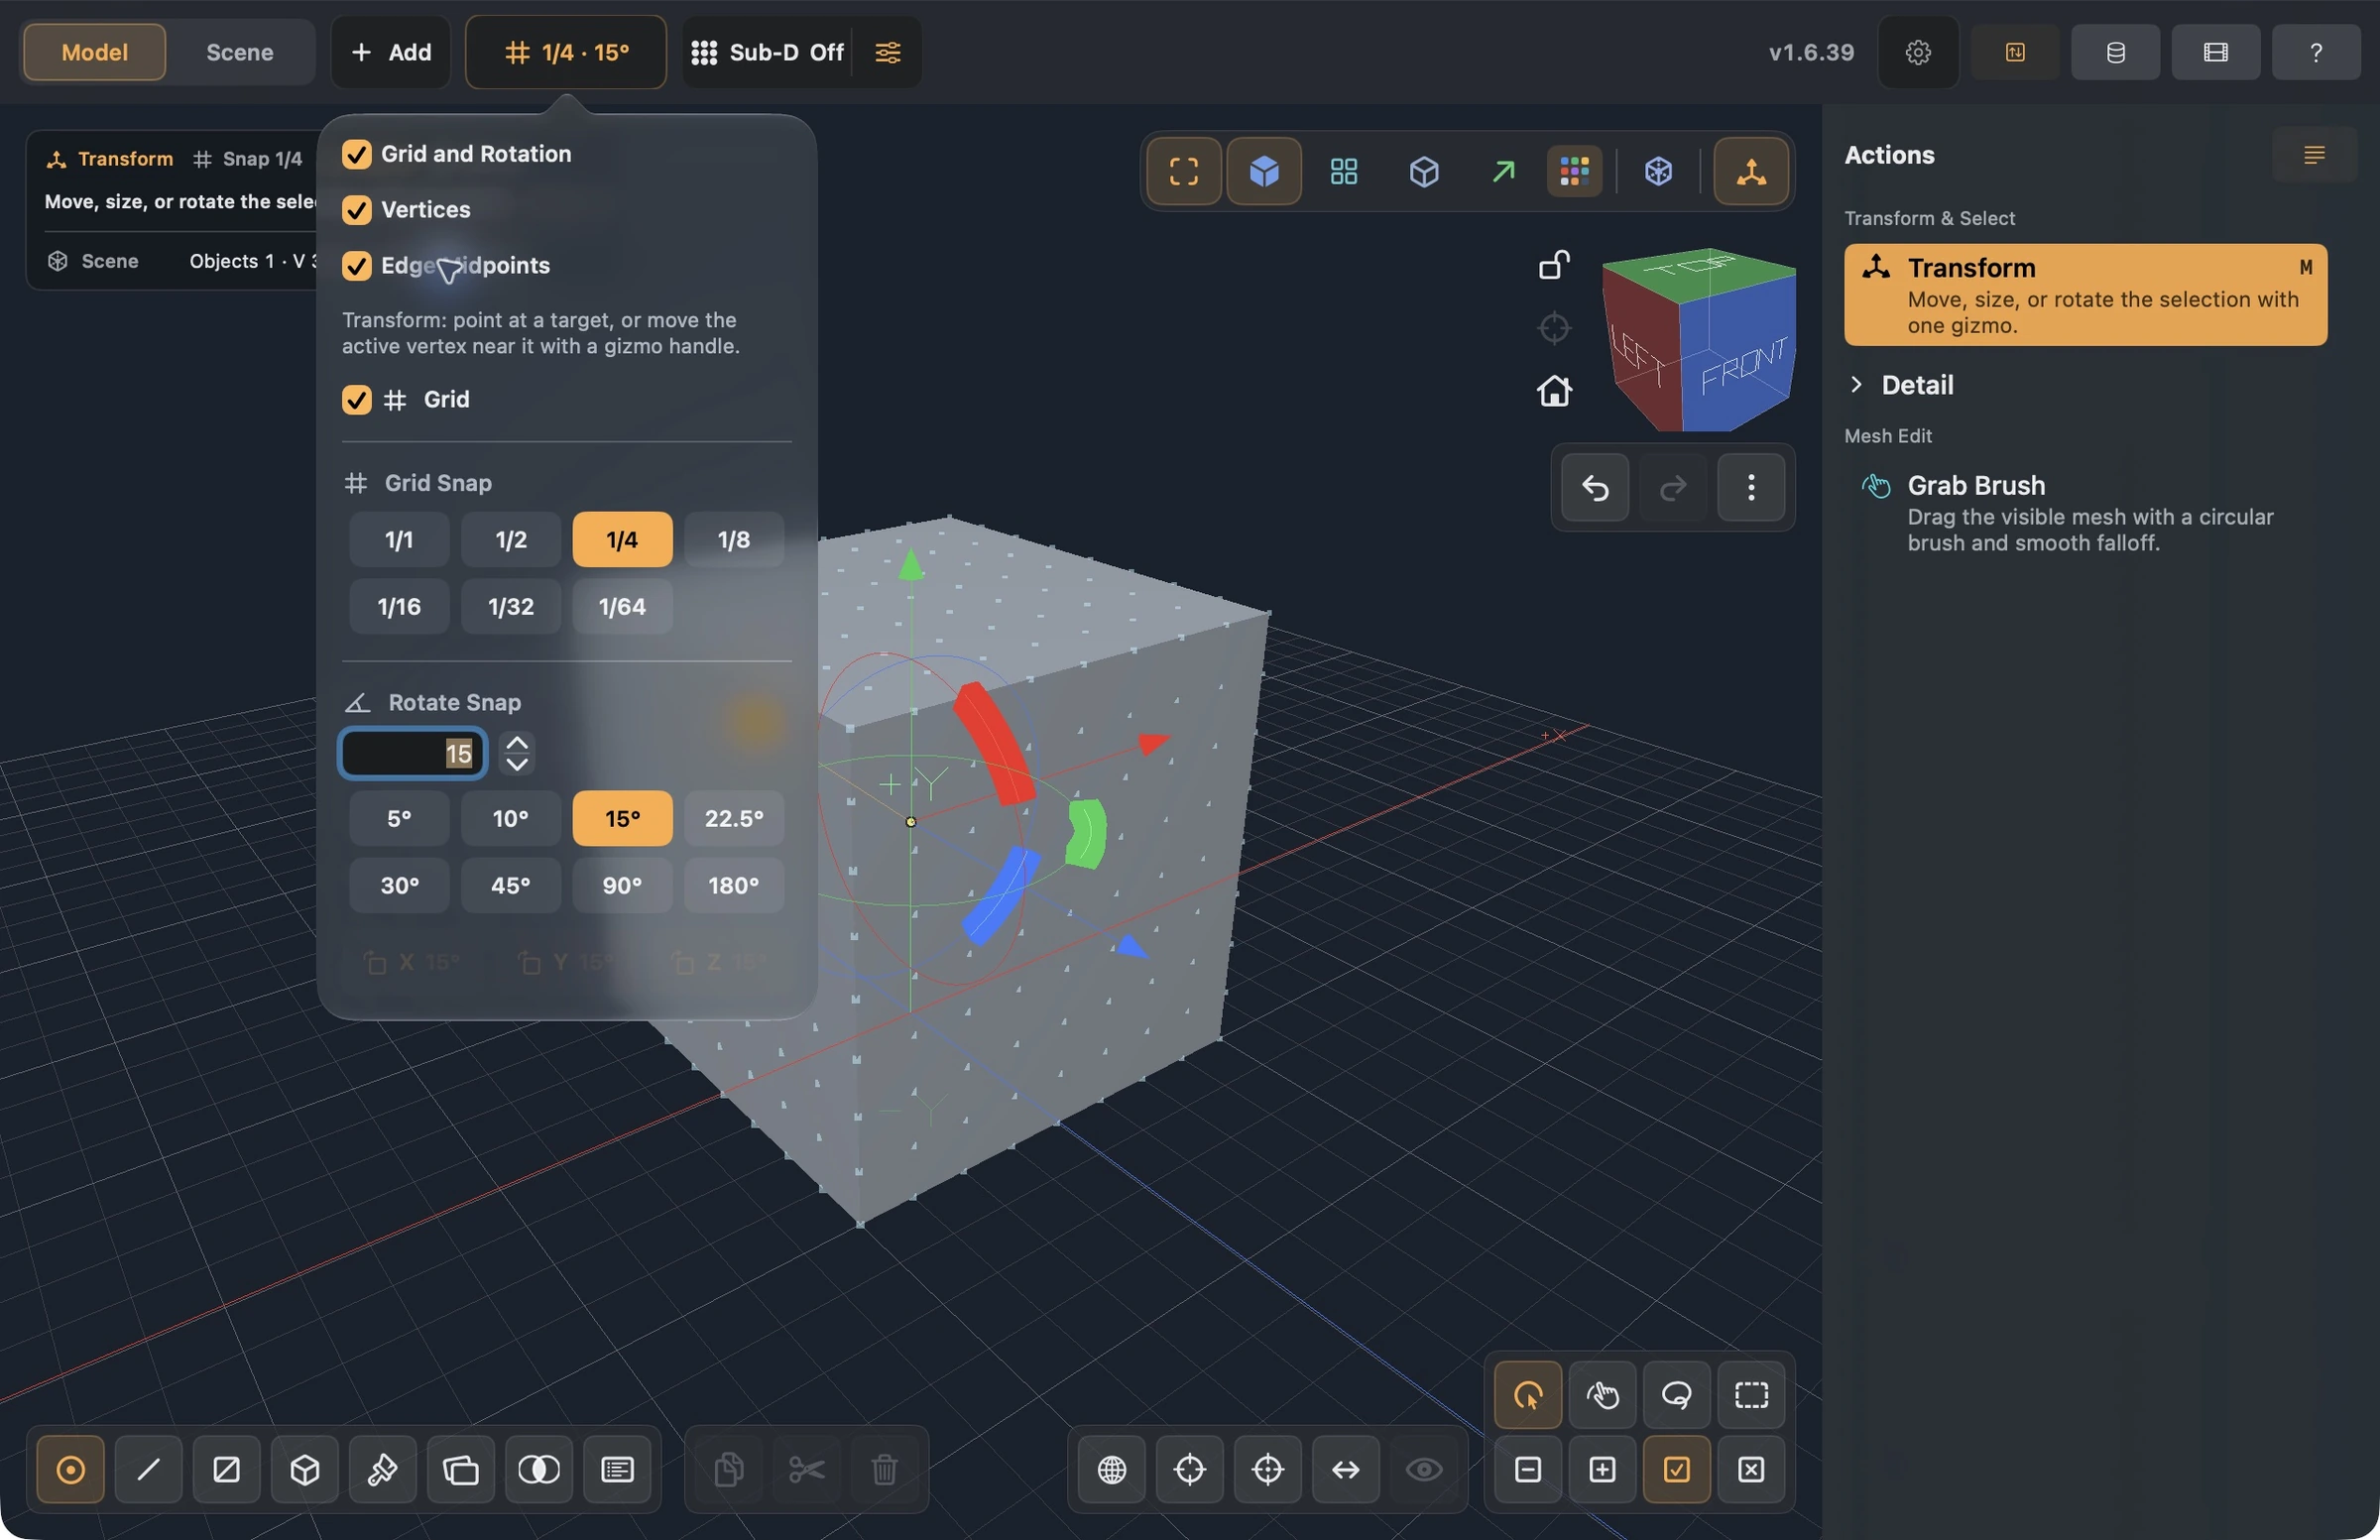
A captured target under the pointer places the source exactly in 3D, overriding the gizmo axis and grid while captured. Away from a target, an arrow retains its axis constraint. Offset handles can also capture reachable anchors near the moving source. Other selected vertices follow the active source together.
Snapping does not weld vertices or join objects. Use Weld or Merge separately if the topology needs that change. Grid visibility is also independent: hiding the grid does not turn off geometry snapping.
Check your result
- Confirm you moved the intended active vertex and that the other object stayed stationary.
- With multiple selected vertices, confirm their relative placement was preserved.
- If an anchor feels hard to reach, zoom in and point at the intended target rather than relying on grid rounding.
- Use Undo between experiments. Finish with a deliberate selection before resuming mesh edits.
For defaults and custom assignments, see Keyboard shortcuts.