Round and repeat a part
Make a rounded block, then create four evenly spaced blocks with Array. This is useful for repeated posts, machine parts, buttons, or decorative blocks.
Start with: the default cube in a new document, selected in Object mode. Keep the default 2-unit width for the spacing example. Screenshots use the Mac SwiftUI app, v1.5.30.
New to the controls? Match the starting state and learn selection/number entry before continuing.
1. Soften the block with Bevel
- In the right Actions panel, choose Bevel under Mesh Edit.
- In the floating card, set Amount to 0.20 and press Return.
- Set Segments to 3 and press Return.
- Inspect the rounded edges in the preview. Click Apply Bevel once, then Done.
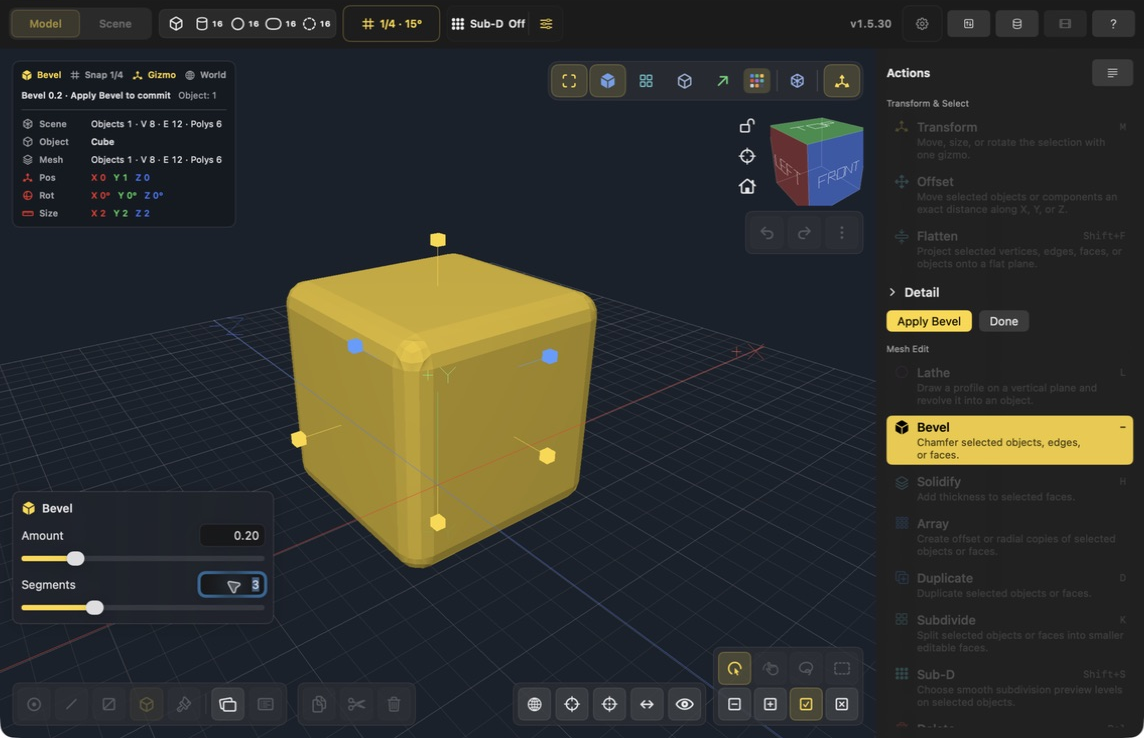
Amount controls the width of the bevel. Segments controls how many strips form its curve.
Use 1 segment for a single flat chamfer. More segments make the transition rounder and add more geometry. Try a small amount before increasing it; large bevels can run into neighboring features.
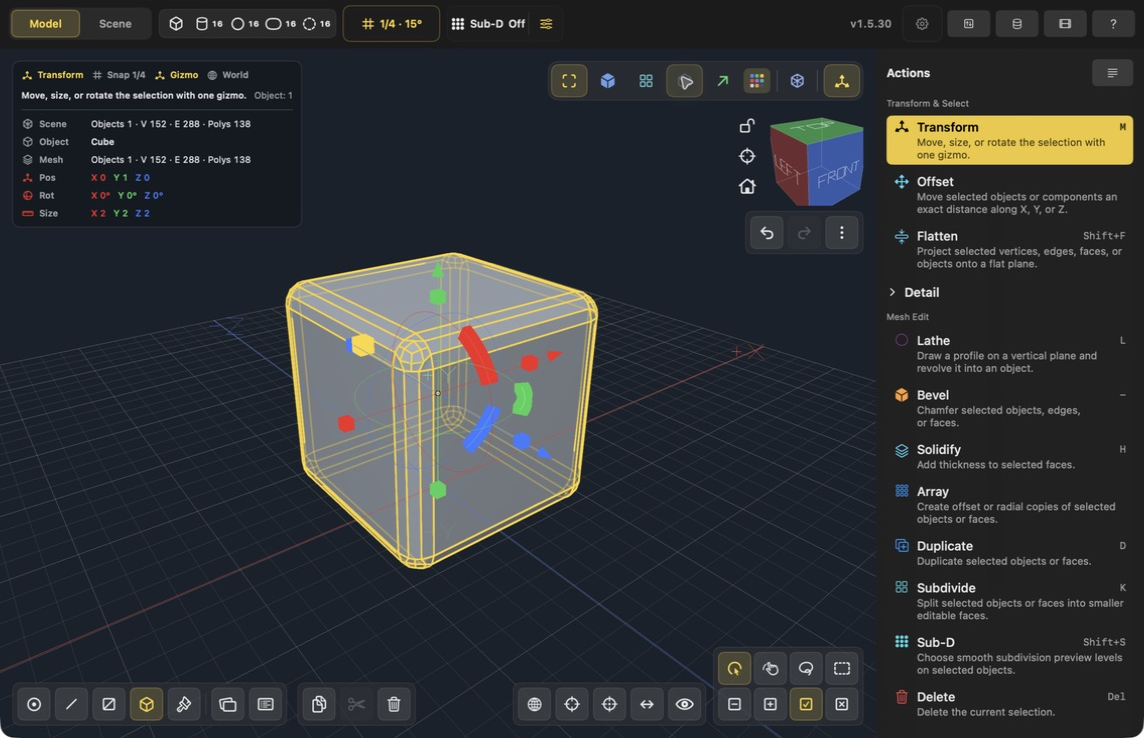
After Apply and Done, Shaded + Wire reveals the real new faces. Bevel changes the mesh; it is not just a shading effect.
Selection changes the scope: Object mode bevels the selected object; Edge mode targets selected edges; Face mode bevels the selected face region's border. Begin in Object mode for this whole-block exercise.
2. Repeat the block with Array
- Keep the beveled object selected in Object mode.
- Choose Array in Actions.
- Set Count to 4. Count includes the original: this makes three new copies.
- Choose Offset mode.
- Set X = 3, Y = 0, Z = 0, pressing Return after each field.
- Inspect the four preview positions. If the row extends outside the viewport, zoom out with small scroll movements. Keep the pointer over the viewport when zooming, and inside Actions when scrolling to Apply.
- Click Apply Array once. In Object mode, Array creates the copies and returns to Transform automatically.
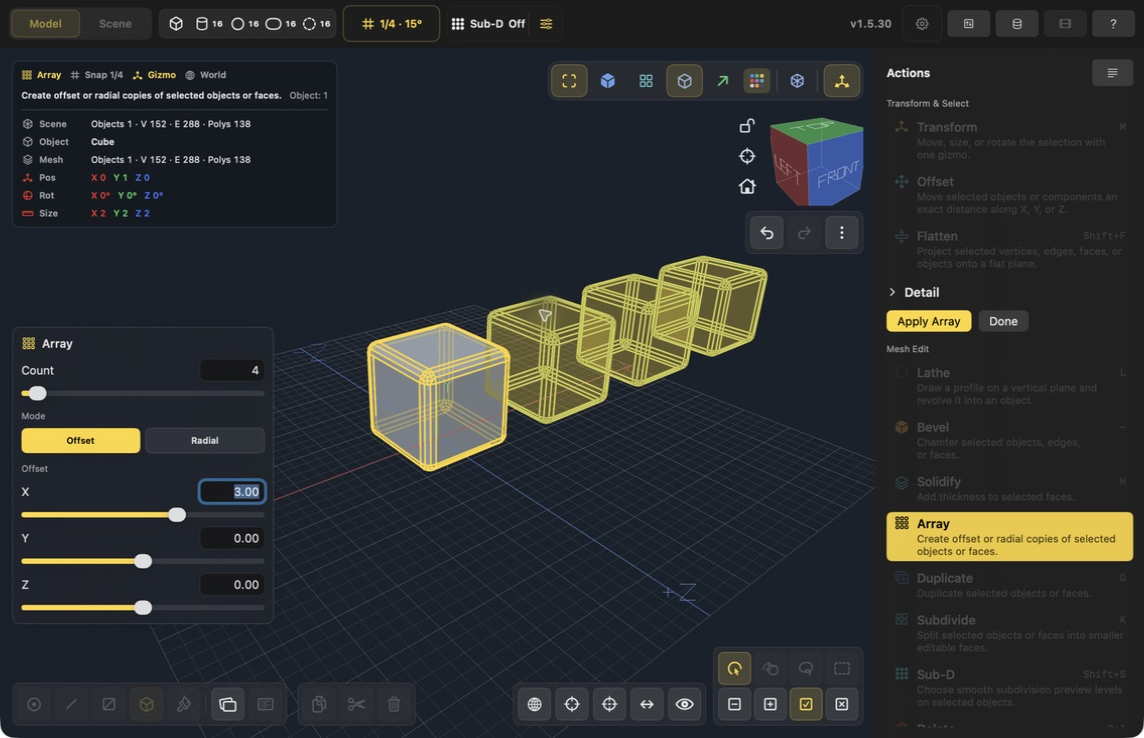
Offset is the displacement between successive copies, not the empty gap. These 2-unit-wide blocks use a 3-unit X offset, leaving a 1-unit gap.
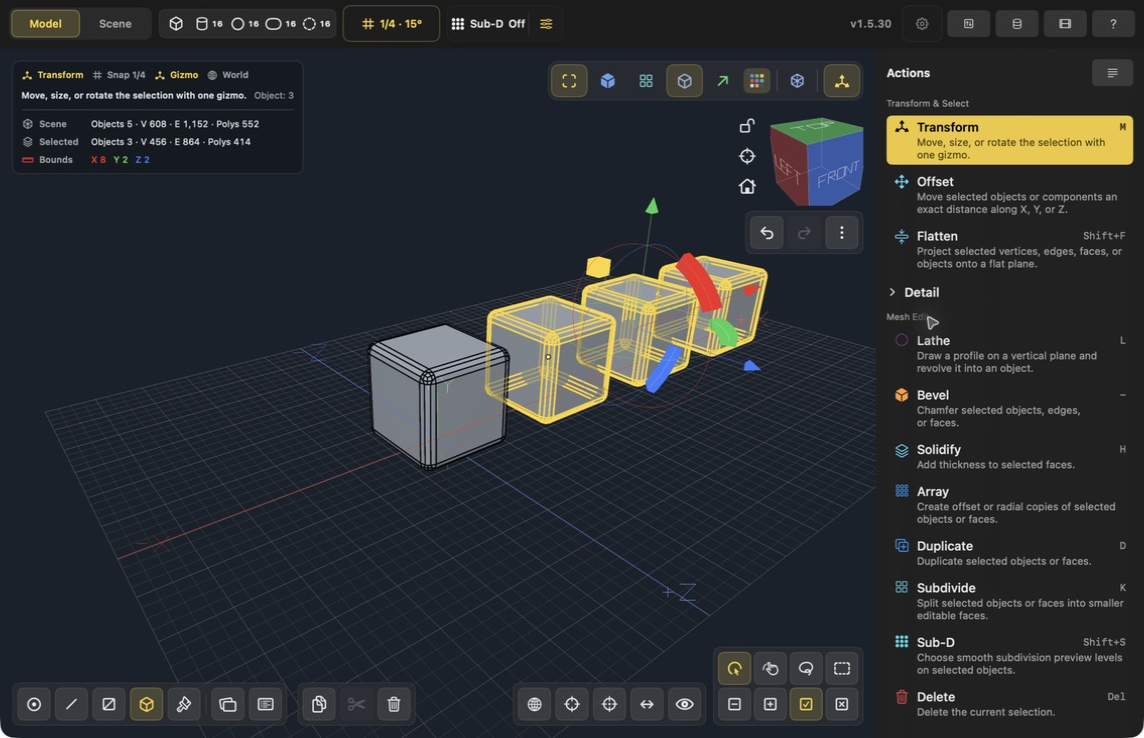
After applying, the three generated copies are selected. They are organized in a group, so the scene object count can include a group in addition to the four visible mesh objects.
Try different patterns
| Settings | Result |
|---|---|
| X = 3, Y = 0, Z = 0 | A straight row |
| X = 0, Y = 3, Z = 0 | A vertical stack with gaps |
| X = 3, Y = 1, Z = 0 | A rising row like steps |
| Radial mode | Copies distributed around an axis and center |
For a radial arrangement, first place a part away from the desired center of rotation. Choose Radial, then choose the axis, center, count, and angle. World uses world zero; Selection uses the selection center. A part centered on the chosen axis may overlap its rotated copies, so inspect the preview before applying.
Bevel, Sub-D, Subdivide, or Duplicate?
- Bevel changes particular edges into chamfers or rounded strips. Use it when the block should remain broadly box-shaped.
- Sub-D previews a smoother version of the whole surface. You can change its preview level or turn it Off; Freeze Sub-D is the separate step that bakes it into mesh geometry.
- Subdivide splits faces into smaller editable faces. It does not mean “round these corners.”
- Duplicate is convenient for one additional copy that you will position yourself. Array places many copies at a repeatable spacing or angle.
Troubleshooting
- Copies overlap: increase the offset, or move the original away from the radial center.
- The model becomes unexpectedly dense: lower Bevel Segments or use Undo before trying again.
- The row doubled again: another Array was applied to the generated selection. Undo that operation; check the selection before starting a new array.
- Bevel is unavailable or reports an issue: start with a small value on a clean cube to learn the tool, then inspect the reported mesh issue on your own model.
Next, start a new document for UVs and your first painted face.